This review is done by Mark O'Neill Doctor Sonar Pro Staff
Lowrance first introduced the touch screen family of products to the fishing industry in 2012. While the touch screen does open doors for ease of operations that can be achieved by a single touch of the
screen as opposed using a cursor and clicking on various keys to achieve the same results, touch screens are expensive and that leads to higher costing units. With the new Lowrance Hook2, which is being labeled as the easiest-to-to use fish-finder, a similar interface as the HDS Touch/Gen 3/Carbon units has been incorporated, but without the touch screen. This leads to very easy to use operations where one incorporates the use of the cursor as opposed to just the touch screen to choose the desired function.
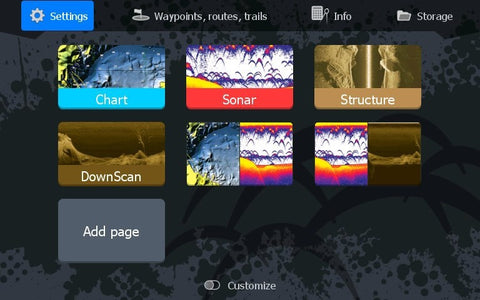
Additionally, the new Hook2 series has gone to a wider screen format on all models starting with the value priced Hook2-4X all the way up to the top end Hook2-12, which enables the user to now have more viewable screen area, which is especially nice when having three screens showing vertically at once.
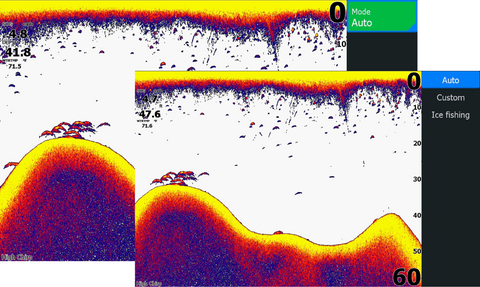
For those that want a unit where one simply has to turn it on and fish, then this may be the unit for you. But there is much more to this unit than that if one desires. There are three different sonar modes, Au- to, Custom and then Ice Fishing. When run in Auto mode, the sonar will operated in the high chirp frequency and all functions are fully automatic. If one desires to make some adjustments or to change to 200 kHz, one simply changes to Custom mode and you have full adjustability. For those that ice fish, the Ice Fishing mode will enable another independent set of options that can be set and retained just for ice fishing, which I have to admit makes this a very attractive versatile device.
For most anglers the Auto mode will work just fine as the sonar cone angle has been increased to 44 degrees, which is about two times the range of most common sonars. So what does that mean for your average angler, the ability to see more fish.
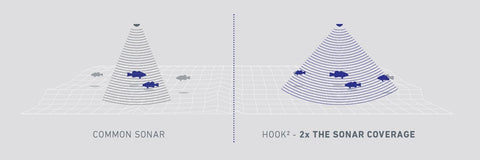
Lowrance Provided Image
There are a number of different model choices to choose from, ranging from the very affordable Hook2-
4x to the top of the line Hook2-12 Combo. While the Hook2 is being targeted at the low-mid level tier product segment, the features available are very impressive with three different transducer options will be offered, the Bullet, SplitShot and TripleShot.
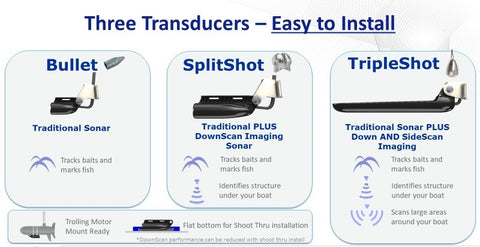
Lowrance Provided Images
In addition to sonar, Down and SideScan options, there are also GPS options that the consumer can choose between. Models choices range from sonar with GPS plotter (no mapping, but does include the ability to save and use waypoints and trails), and then combo units that add full GPS Mapping (micro SD slot for upgraded mapping and software updates.
The connectors, both transducer and power have changed from the traditional screw locking types used on the older Hook models to a press fit O-ring sealed style. The fit is a tight and seals well, so I do not see this as an issue.
Lowrance Provided Image
So as with any fish-finder, the bottom line is performance. One can taunt all the features one wants, but if the unit doesn’t perform, those features are meaningless. The Hook2 brings in new life to the Hook family of products as compared to its predecessor. In fact the Hook2 has very little in common with the previous generation of Hook models. The interface for the Hook2 is much simpler to operate, the
screen image is much clearer and the processor is lightning fast as compared to the original Hook models.
As far as performance on the water, the Hook2 performed extremely well. As stated, the sonar, DownScan and SideScan functions have an “auto” mode which enables the user to simply fish and not have to worry about fine tuning settings. For more the more advanced user, one does have the ability
to customize the settings if one so desires. Running the sonar and DownScan in auto, I had no issue seeing baitfish, predators and even my own bait while fishing.
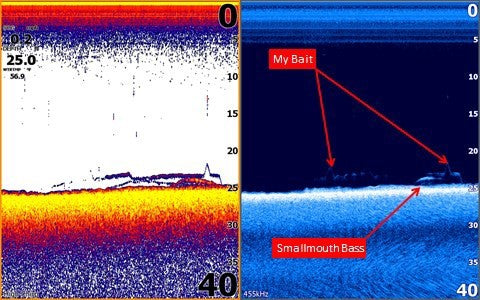
Another nice change for the Hook2 is with mounting system of the units themselves, the 4 and 5 inch displays now incorporate a very well thought out base that is very solid and yet the unit can be easily removed when needed. This replaces the former Hook base for the smaller units which proved to be difficult at times or some end users.

Conclusion
The Hook2 product line will be a winner in my book, it definitely fills all voids that the earlier Hook versions had and then adds simplicity and more capabilities. With a range of 12 different configurations available in varied price ranges, there is a model for everyone based on their needs. Although designed for the entry to mid-level end user, anyone on the water will find value with this product.
HOOK2 Training DVD
Mark O’Neill
Doctor Sonar Pro Staff

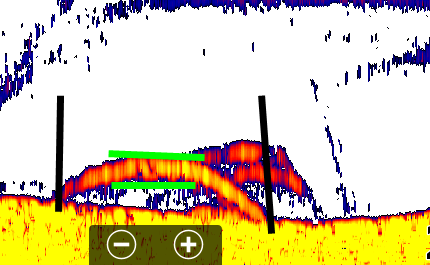
Identifying fish size on sonar is very difficult since you can change the size with sensitivity adjustments or depth range. Fish look larger on a depth range of 20 foot than 100 foot. The size of a fish is determined by the color of the fish arch. For example if you have palette colors yellow, blue and red. The more yellow you see the bigger the fish. The thickness of the fish arch also determines fish size. How long the fish arch is just how long the fish is below the transducer.
In the image the black vertical lines show how long the fish is under the transducer and the green lines show the thickness of the fish arch.
The best way to tell size is catch one the fish you see on sonar or use an Aqua-Vu camera.
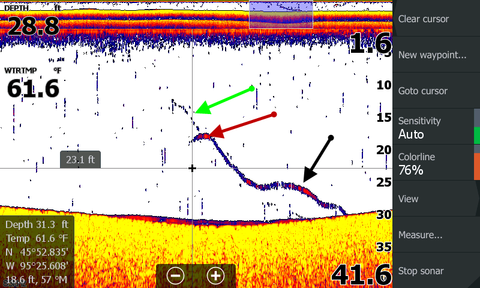
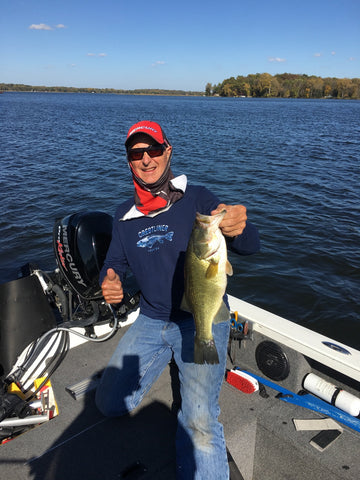
The first example shows my bait dropping (green arrow), the bait is intercepted by a bass (red arrow) and the bass swims to the bottom (black arrow) and then I set the hook and catch him.
This is the bass.
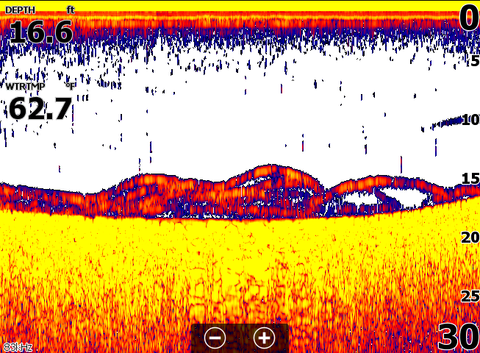
How about these fish. Needless to say I was excited when I found them but they didn't bite so I dropped the Aqua-Vu camera and was surprised what I found.
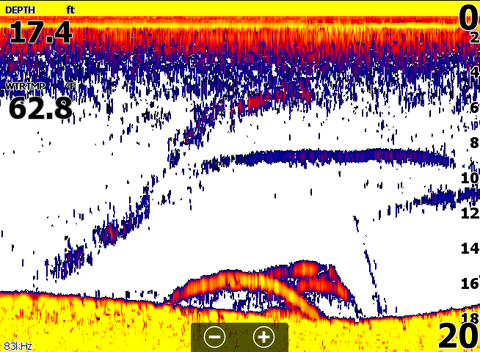
Watch video of fish
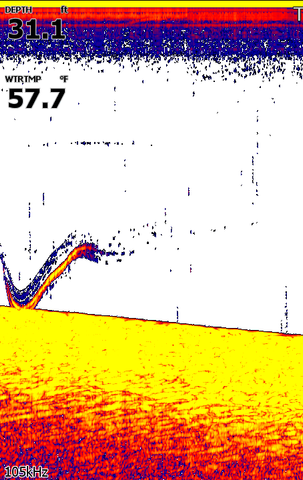
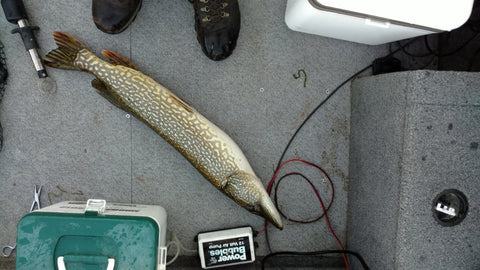
On this screenshot is a 7.5 lb. northern pike, you can see when I set the hook and started bringing him to the surface.
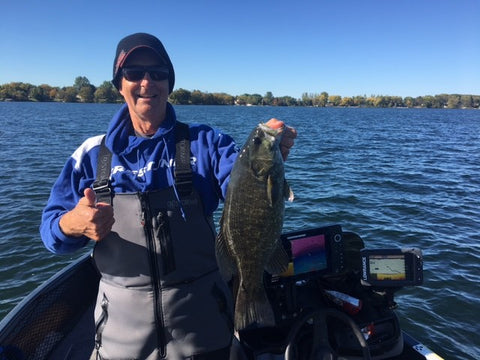
The last screenshot is smallmouth bass and I caught a few, this is a picture of one of them. One of my favorite fish to catch.

This screenshot shows a 29.5 inch walleye after being released.
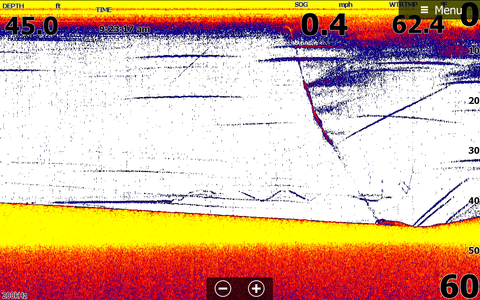
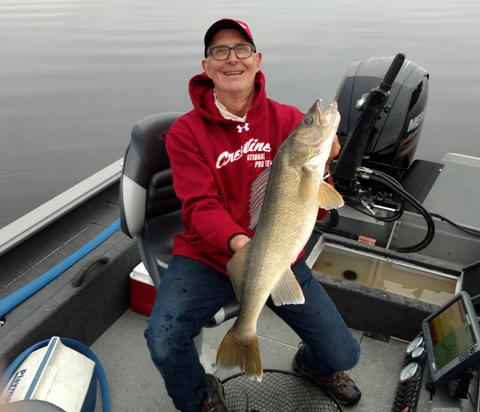
I was lucky in my timing to collect good data to prove fish size on sonar.
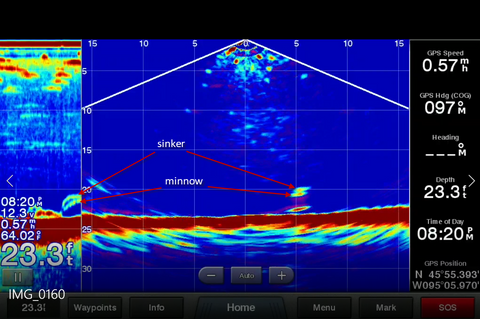
Last but not least is what a 5 inch minnow attached to a sinker looks like with 1.5-2.5 lb. walleyes below it.
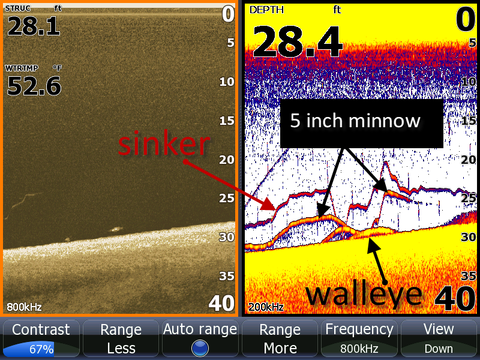
Learn how crappies display on different sonar brands.
Crappies are a much sought after fish and I get a lot of questions about what they look like on sonar. Crappies often suspend over open water, making them difficult to target. In this session I will show what they look like on different sonar brands.
Image #1 shows crappies on a 2D Garmin sonar using High Chirp.

Image #2 shows the same school with a Humminbird using the MEGA transducer on High Chirp.
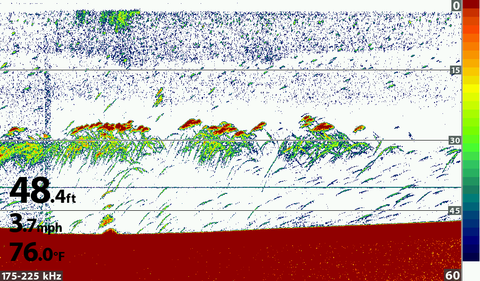
Image #3 is the same school using a Lowrance TM150 transducer set at 105 kHz frequency.
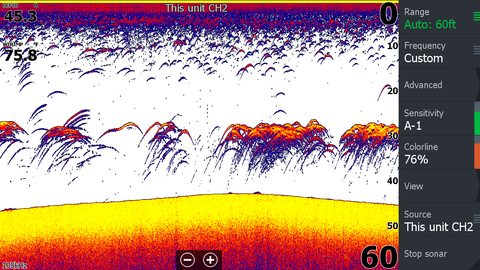
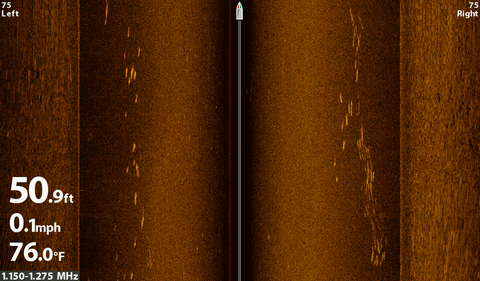
Image #4 shows the same school with the Humminbird side imaging
Next are 2 videos showing the Panoptix with 2 different transducers. The PS 30 looks down and to the side and the PS 21 looks to the side.
I use side imaging or the PS 21 to find the school when it moves since they see to the side and I use Minn Kota Spot Lock to sit on the school and vertically jig for supper.
PS 21 video
PS 30 video
GPS Accuracy Posted on August 26, 2017
Ever wonder why your big boulder is in a different place than your waypoint at times? GPS can more accurate one day depending on satellites and weather and where your fish.
The boat is at my dock and I cleared the trail after the GPS locked in really good. This example is normal, I have repeated it many times and this was one of the most accurate examples. I did this one with Lowrance's point 1 GPS.
Your big boulder could move 25 feet on you while you were fishing it!
2 short videos
#1 shows bluegills on the Panoptix and explains how the Panoptix works and displays them.
Panoptix video
#2 Aqua-Vu footage of the same bluegills as seen on the Panoptix.
Aqua-Vu video
Drop Shotting with Panoptix Live DownVu
Drop shotting (fishing vertically) is usually done with 2D sonar. This session will explain drop shotting with Panoptix and explain in detail what you are seeing.
Watch live video
I use sonar to find fish every time I go out but sometimes the fish can hide. Two good examples are boulders and steep drop-offs. The sonar beam is reflected off the bottom on steep drops and off the boulders and the fish can’t be separated.
I drove over this drop-off that had boulders and didn’t see any fish with either the Humminbird or the Lowrance.
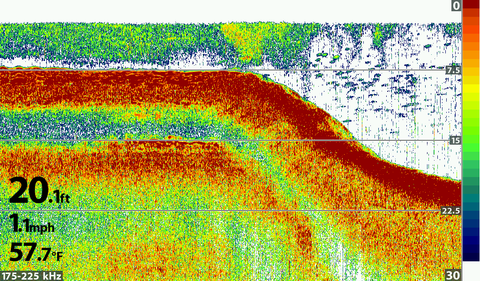

I stopped on the edge and used the Spot Lock feature of my Minn Kota trolling motor on the edge and dropped my Aqua-Vu camera down and found these crappies but not just here but each time I moved along the edge there were more crappie.
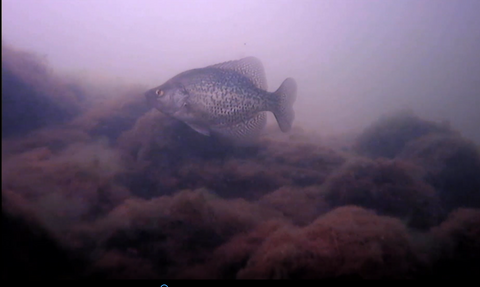
Watch crappie video here
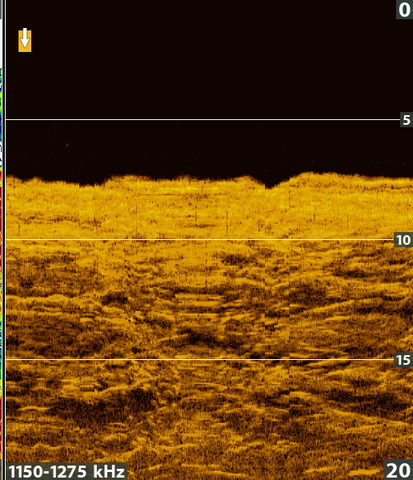
Even the down imaging couldn’t separate the crappies from the boulders while I was sitting over them.
Notice the crappies are very close to the boulders in the video.
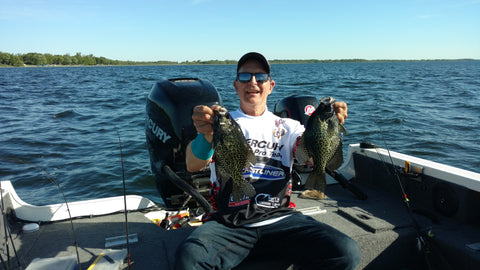
They did bite and they posed for the camera before being released (I had fresh walleye back home).
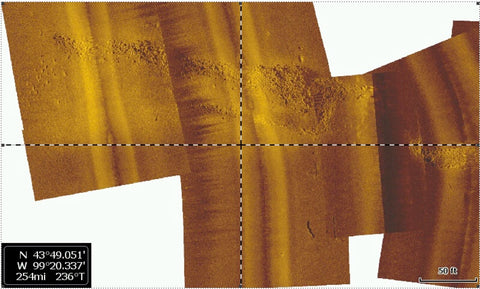
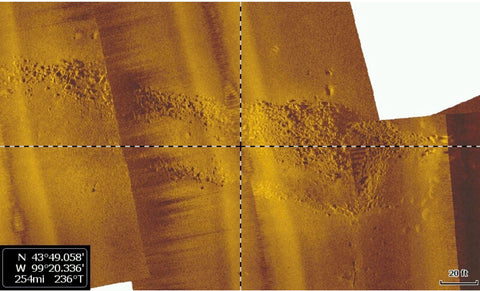
You can make mosaics with Humminbird Helix models using Autochart Pro which is a computer app. You record the sonar data to a blank card and use Autochart Pro to make the mosaic and export it as a mosaic to your Helix. You will use it as the chart with your boat cursor on this map. If you find tech easy this is a good way to use Spot Lock on your favorite reef spot.
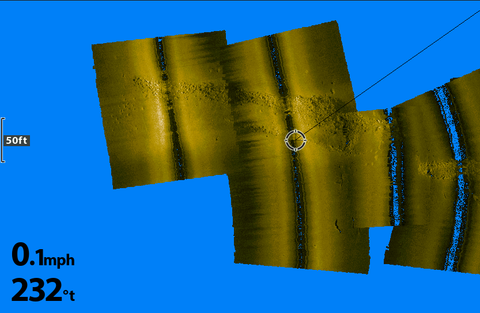
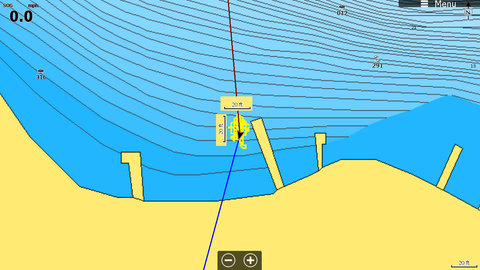
StructureMap is available on the HDS and Carbon but you can share it with the Hook!
If you have logged sonar with a model with side scan you can open it in ReefMaster and export it as map. Think about the value for trolling or anchoring on key structure when the image is your map.
The first image is zoomed out and the 2nd image is zoomed as far as I can with the Hook. Notice the 20 foot scale in the lower right corner for reference.
Since I didn’t have my StructureScan 3d transducer yet I used the Helix Mega to get the side scans. As you can see the MEGA imaging is very crisp.
ReefMaster works with both Lowrance and Humminbird.
If you find tech easy this is a good way to use Spot/Anchor Lock on your favorite reef spot.


