Side scan saved the day. the weed, sand and mud edges were easily seen. The little sand dip in the weeds is where we found walleyes. They were on the sand right next to the weeds.
No wind, clear water and sunny. Only bass shallow so we looked deeper and found some at 22 foot.
Top arrow is mud
2nd arrow is sand
3rd arrow is weedlines
Bottom arrow is weed dip

We were using spot lock to cast for walleye and Levi said look at the sonar. I quickly reeled up and dropped my jig and caught a 4 lb largemouth bass. The 2nd photo is the bass swimming away after I released it.

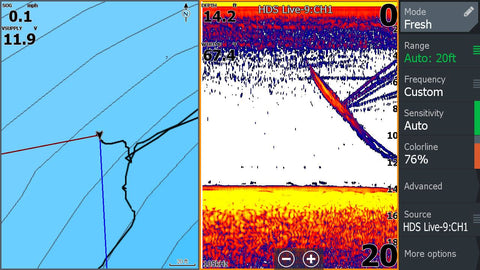
Notice the 2 bright yellow arches (green arrow) in the red bait (black)

I looked at lots of areas and didn't see any fish and caught fish. But here is one example where the fish showed up.

Fish in vegetation, you don't have to see fish to catch them. I often don't mark fish in weeds but still catch them like this one. I spotted the fish with my Aqua-Vu and dropped my bait near the camera!


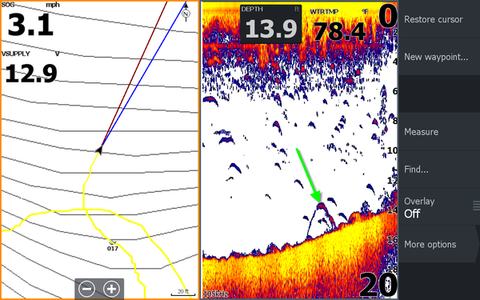
Green arrow shows nice fish on down imaging but looks small on 2D. It is probably on the edge of the 2D cone and the DI cone is wider so shows the fish better.
Reason to run DI and 2D sonar. I also use Navionics on my Lowrance and LakeMaster on my Humminbird. DI (down imaging) is better in weeds most of the time.

My Garmin PS30 shows the distance to the side the fish are.
Green arrow 3 feet to the left of the transducer which is mounted on boat's mid-line.
White arrow 8 feet to left.
2D sonar only tells you how far off the bottom and that the fish in the cone somewhere.


#6
Red circle fish
Black arrow weeds
Green arrow small boulders on hard bottom point.
Blue arrow bait balls that create shadows on side scan.

This should help get started in interpreting your sonar.
Side imaging training
Above the black is smeared because I was turning the boat.
The green arrows shows patches of weeds in boulders and yes this is a good place to fish!
Learn how crappies display on different sonar brands.
Crappies are a much sought after fish and I get a lot of questions about what they look like on sonar. Crappies often suspend over open water, making them difficult to target. In this session I will show what they look like on different sonar brands.
Image #1 shows crappies on a 2D Garmin sonar using High Chirp.

Image #2 shows the same school with a Humminbird using the MEGA transducer on High Chirp.
Image #3 is the same school using a Lowrance TM150 transducer set at 105 kHz frequency.
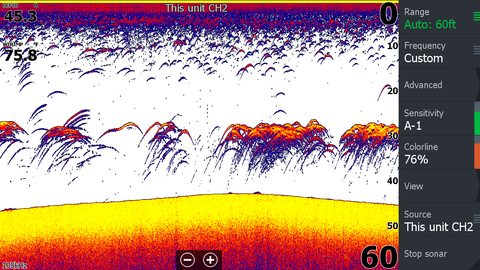
Image #4 shows the same school with the Humminbird side imaging
Next are 2 videos showing the Panoptix with 2 different transducers. The PS 30 looks down and to the side and the PS 21 looks to the side.
I use side imaging or the PS 21 to find the school when it moves since they see to the side and I use Minn Kota Spot Lock to sit on the school and vertically jig for supper.
You can make mosaics with Humminbird Helix models using Autochart Pro which is a computer app. You record the sonar data to a blank card and use Autochart Pro to make the mosaic and export it as a mosaic to your Helix. You will use it as the chart with your boat cursor on this map. If you find tech easy this is a good way to use Spot Lock on your favorite reef spot.
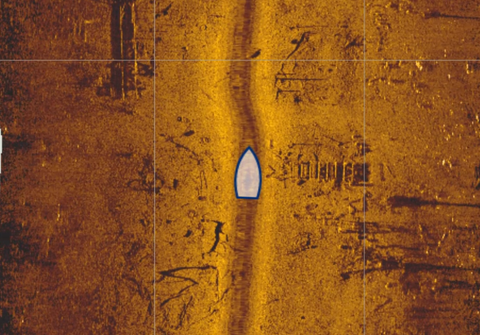
Side imaging produces nice images of how boulders really look like and I use it to find key spots that I miss with 2D and down imaging sonar.
This image is a boulder reef. On this image the biggest boulders are next to smooth bottom. This also means there is probably a dropoff next to the boulders. Walleyes like transitions, big boulders and dropoffs so I have 3 key ingredients to start my hunt for groceries for my famous fish tacos. I don't see any fish but fish are difficult to see in boulders since they also show up as white.
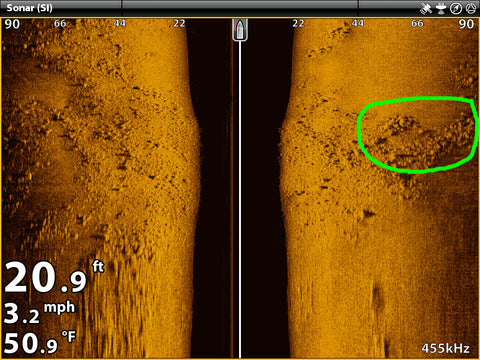
This link will show an Aqua-Vu video of the transition. watching it confirms it is a good spot and helps understand the side imaging
Ever wonder what to do when you are slowly moving jig or rig fishing and lose the fish on sonar?
I had these fish near weeds located with down sonar (2D and down imaging).


If they disappear I look at the side imaging on a different screen to see if they are left or right. Like this image.
I place the cursor on the fish on the side imaging and create a waypoint and then move the boat to the fish before they move too far. It is easy, once you catch a few fish this way you add it to your fishing tools.

Finding fish with side imaging is difficult for most anglers since we don’t have enough screens on the boat. We tend to select map, sonar and Down Imaging and forget about the side imaging, but finding fish is easy if you have the right conditions. One of the problems we run into is that a rocky bottom reflects so much of the sonar it’s bright and fish show up as bright areas which means there is little contrast and they are easily hidden, while softer bottoms show up darker so fish really show up in this image.
Notice all the fish on the right on the first image.

I usually leave my unit on 455 kHz since you get much more range than with 800 kHz.
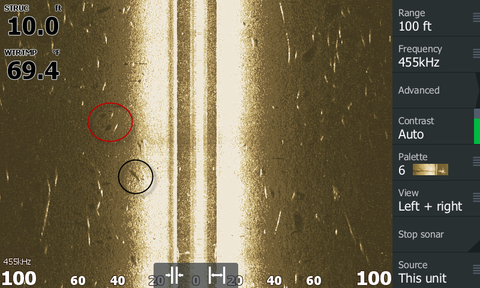
The next image shows larger fish in the red circle and smaller fish in the green circles. Notice the depth is 3.7 ft.

But don’t be fooled by logs on the bottom left over from the timber logging industry.
Yellow arrows are pointing out the logs.
The red circles are around fish which show up as white dots.
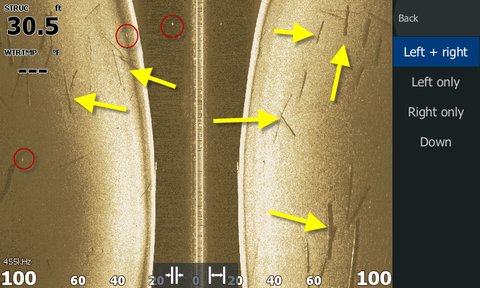
The next image has more fish that are longer. Here we need to remember the length of the fish is dependent on boat speed. The faster the boat travels the fewer sonar pings that are going to cover the fish so their length will show up shorter.
Another good way for identifying fish is the shadow the fish cast, the farther away the shadow is from the fish the higher in the water column the fish is located.
The red and black circles show fish and shadows. The fish nearer the center are harder to see since the bottom is brighter nearer the center so the shadow becomes helpful in identifying the fish.
